Choosing the right led wiring harness is a practical engineering decision, not a cosmetic upgrade. The harness carries current through every connector, branch, and protective sleeve. A poor match can create voltage drop, flickering, heat, or difficult maintenance. These problems often begin with simple oversights. Wire length, conductor size, terminal quality, and installation temperature all deserve attention.
Lighting designer and electrical engineer James Benya has said, “Good lighting is not about the fixture; it is about the visual environment.” That principle also applies to wiring. A bright LED module cannot perform reliably when its harness is undersized or badly routed. The selection process should examine operating voltage, maximum current, connector type, insulation rating, bend radius, and exposure to water, oil, vibration, or abrasion. Check the actual load, not only the advertised wattage. Startup current may be higher than expected.
Small details matter. A sealed connector should click firmly. Copper strands should remain flexible. The fuse should protect the circuit, not hide a design error. Measure the harness length before ordering. Sketch the route first. It saves time later.
Experience still has limits. Even a carefully selected led wiring harness may fail when crimping is inconsistent or installation pressure damages the insulation. A sample test under real heat and vibration is wiser than relying on a catalogue photograph. The right choice balances electrical performance, physical protection, serviceability, and total cost. It may not be the cheapest harness. It should be the one that remains dependable after months of real use.
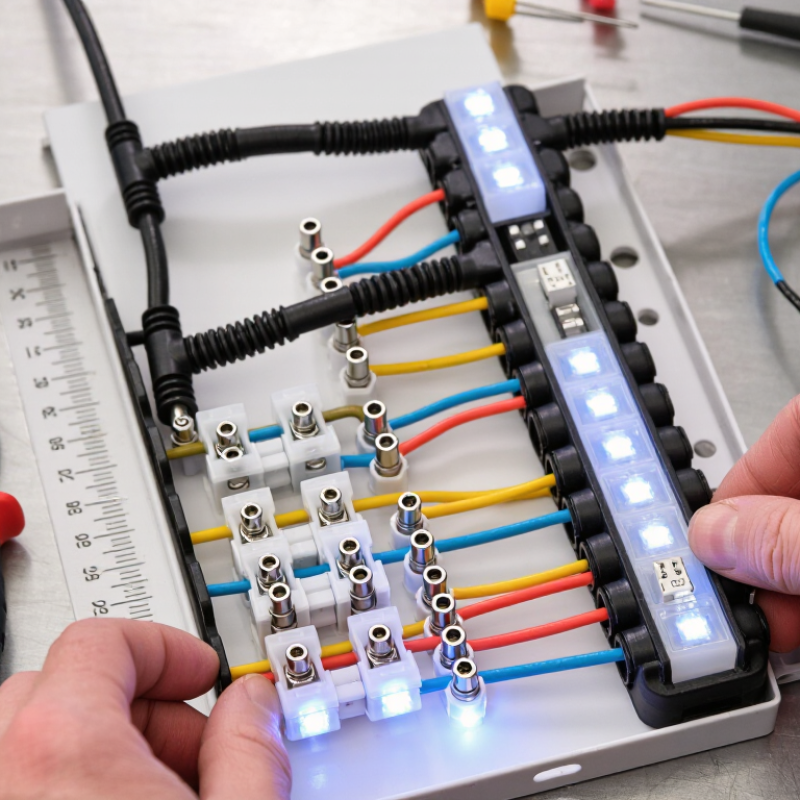
An LED harness should begin with numbers, not connector shape. Record the system voltage, each lamp’s wattage, and total operating current. Divide total wattage by voltage to estimate current. Then add a practical safety margin of 20 to 30 percent. This reduces constant strain on the wiring.
Measure the cable path, including bends, hinges, and service loops. Long runs can lose voltage, causing dim output or uneven brightness. Choose a wire gauge based on current, length, insulation temperature, and installation conditions. Select a fuse near the power source, rated for the circuit rather than guesswork. Check connector ratings too. A connector may fit perfectly and still overheat.
Consider switching and control signals. Some systems need separate ground returns, dimming wires, or relay control. Confirm polarity before crimping.
I once treated a short harness as simple, then found its ground path was too small. The lights worked on the bench but failed under load. That mistake changed my testing routine.
I now measure voltage at the LED during operation, inspect crimp quality, and flex the harness gently. It is not glamorous work. Weather exposure, vibration, and heat also matter, so sealing and strain relief should match the actual installation.
Choosing an LED wiring harness starts with voltage, current, and connector compatibility. Check the fixture label before selecting wire size. A 72-watt LED load at 24 volts draws 3 amps. With a 25% design margin, the harness should handle at least 3.75 amps. The U.S. Department of Energy’s 2023 Solid-State Lighting R&D Opportunities report identifies over 200 lumens per watt as a benchmark for advanced LED performance. Higher efficiency can reduce current, but it does not eliminate voltage-drop problems.
Cable length matters. A 5-meter harness creates a 10-meter electrical loop. Using 18 AWG copper wire, resistance is approximately 0.21 ohms across that loop. At 3 amps, the voltage loss approaches 0.63 volts, or 2.6% on a 24-volt system. That may affect brightness and controller stability. I still see installers sizing wire only by load current. That shortcut can fail.
Connector selection requires equal care. Match the connector’s voltage and current ratings, then check temperature derating, locking strength, and polarity protection. For outdoor installations, IEC 60529 ingress ratings help define resistance to dust and water. An IP rating is not a guarantee against poor crimping. Follow recognized workmanship guidance, such as IPC/WHMA-A-620, and inspect terminals mechanically before sealing the harness. Small details matter. A loose crimp can create heat long before the LED appears dim.
Choosing a suitable wire gauge starts with current, cable length, and voltage. A harness carrying higher current needs thicker conductors. Longer cables also require larger wire to reduce voltage drop. Check the LED load with a meter, not only the label. Small differences can matter. For a 12-volt system, even a minor voltage loss may cause dim output or unstable operation. Keep the fuse close to the power source, and size it according to the circuit’s safe capacity.
Material selection affects durability. Copper offers reliable conductivity, while tinned copper resists corrosion in humid or marine environments. PVC insulation may suit protected areas, but cross-linked insulation handles heat and abrasion better. Examine the temperature near engines, lamps, and metal edges. I have seen a carefully sized harness fail because its insulation softened against a hot surface. That mistake is easy to miss.
Protective features should match the installation, not merely look impressive. Use sealed connectors where water can enter, flexible conduit near moving parts, and strain relief at every connector. Secure the harness with rounded clips, leaving enough slack for vibration. Avoid sharp bends. Test continuity, polarity, and voltage at the LED before final fastening. Some installations still need rework after testing, which is inconvenient but safer than trusting an unverified connection. Follow applicable electrical codes and the LED manufacturer’s specifications.
Choosing the right LED wiring harness starts with compatibility, not appearance. Match the harness voltage, current rating, connector shape, and wire gauge with the LED module. A connector that clicks firmly may still create heat if its terminals are underrated. The U.S. Department of Energy’s Solid-State Lighting R&D Opportunities report identifies thermal management and system reliability as continuing priorities. That warning applies to wiring, too.
Installation quality matters. Route the harness away from sharp edges, exhaust heat, and moving parts. Leave enough slack for vibration, but avoid loose loops that can rub against brackets. ISO 16750-3 includes mechanical-load testing for vehicle electrical components, reminding installers that vibration is not a minor detail. I have seen clean installations fail because the cable was pulled too tightly. The layout looked perfect. It was not.
Tips: Check polarity before power-up. Measure voltage at the LED end, not only at the source. For outdoor or wet locations, select an enclosure rated under IEC 60529. IP67 protects against temporary immersion, but it does not guarantee resistance to chemicals, abrasion, or repeated flexing. The DOE report also notes that LED performance depends on system-level design, not the light source alone. A harness should be tested under heat, moisture, vibration, and load. In practice, one test is rarely enough. Reflect on the actual environment, because laboratory confidence can become field disappointment.
Voltage-drop comparison for a 12 V LED circuit operating at 5 A. Values are calculated from typical copper conductor resistance and a two-way circuit length.
Confirm the harness voltage rating, current capacity, connector type, polarity, and terminal fit before installation.
Keep voltage drop low, protect cables from abrasion, secure them against vibration, and seal cable entry points.
Check the insulation temperature range, water and dust protection, UV resistance, chemical exposure, and corrosion resistance.
Verify Safety, Quality, and Long-Term Performance Before Purchase
A suitable LED wiring harness should match the lamp’s voltage, current, and installation environment. Do not guess. Check the wire gauge, fuse rating, connector type, and maximum operating temperature. Undersized wires may become hot behind a sealed panel. That mistake is costly.
Inspect the insulation closely. It should resist abrasion, moisture, oil, and heat where necessary. Look for secure crimping, sealed connectors, and consistent wire lengths. A loose terminal can cause flickering, voltage drops, or sudden failure during vibration. Pull each crimp gently before installation. Small details matter.
In practical workshop checks, I also measure voltage at the lamp rather than trusting the battery reading. A long harness can lose noticeable voltage, especially with high-current lighting. Choose protection that suits the circuit, not merely the light’s advertised power. Confirm the fuse location and leave enough slack for service without creating loose loops. I once overlooked a connector’s temperature limit, and the harness performed poorly near a hot engine area. That experience changed my inspection routine. Quality is not always obvious from a clean appearance. Ask for electrical specifications, material details, testing evidence, and clear installation guidance before purchase.