How to Choose LED Strip Light Connectors in 2026

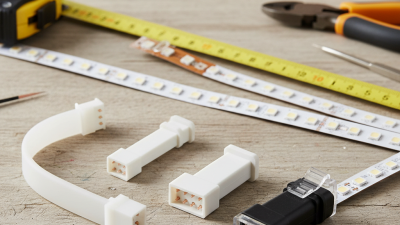
Choosing the right led strip light connectors in 2026 requires more than matching two pieces of tape. The connector must fit the strip’s width, voltage, LED layout, and installation environment. A 10mm single-color strip may need a simple two-pin connector. A 12mm RGBW strip usually requires five contacts. Small differences matter.

Lighting designer and educator Mark Karlen offers a useful principle: “Lighting decisions should serve the space, not merely the fixture.” That idea applies directly to connectors. A kitchen backsplash needs compact, heat-resistant connections. A covered patio needs stronger sealing and an appropriate IP rating. A display cabinet may need a low-profile connector that stays hidden behind a narrow aluminum channel.

Check the copper pads before buying. They should align cleanly, without forcing the strip into place. Confirm the connector’s current rating, especially with high-density COB tape or long runs. A connector can look correct and still create flicker, heat, or voltage loss. That is an easy mistake to make.

This guide compares solderless clips, corner connectors, jumper wires, and waterproof options. It also examines compatibility with 12V and 24V systems. Some products promise tool-free installation, but their contact pressure may weaken after repeated movement. Others work well indoors but fail when moisture reaches the contacts. Real installation experience is less tidy than product packaging suggests. Measure twice, test a short section, and leave room for correction before committing to the full run.
How to Choose LED Strip Light Connectors in 2026

Understanding LED Strip Connector Types and Their Functions

Choosing LED strip connectors in 2026 starts with understanding their functions. A connector joins copper pads without cutting the strip. It also maintains electrical contact between separate sections.

Two-pin connectors suit single-color strips. Three-pin models support addressable strips with data control. Four-pin connectors commonly fit tunable-white or RGB strips. Match the pin count carefully. A mismatch can damage the connection.

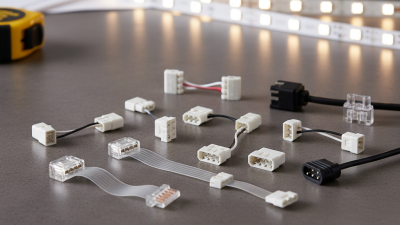
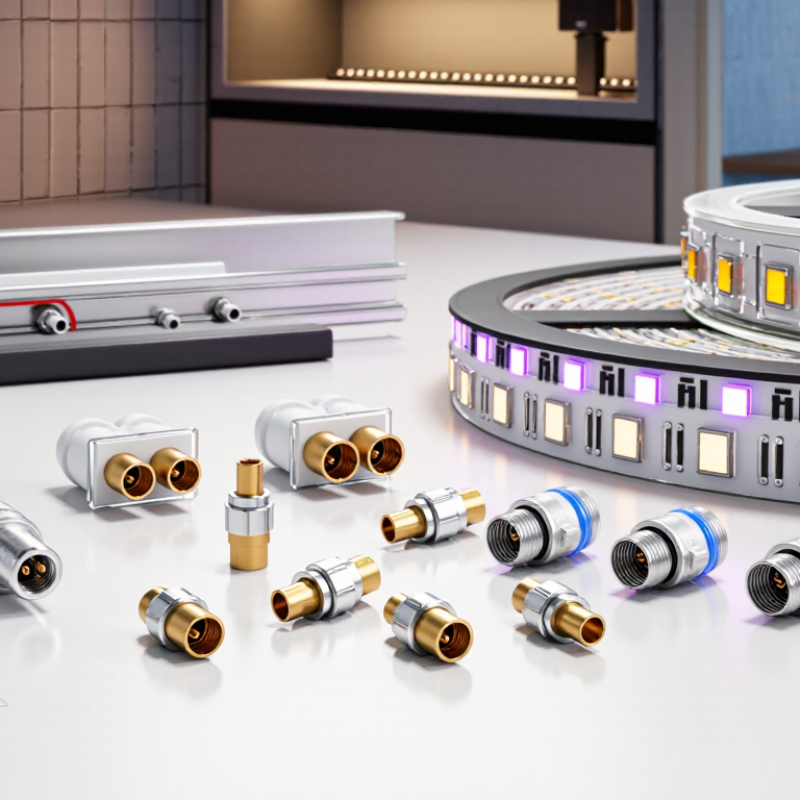
Solderless clip connectors install quickly with a small latch. They work well during temporary layouts or repairs. Soldered joints usually offer stronger contact and better resistance to vibration. Corner connectors help strips turn around 90-degree angles. T-connectors divide one power path into two branches. Gapless connectors reduce dark spots between adjacent sections.

Waterproof strips need sealed connectors with matching protection. An exposed clip can collect moisture and cause flickering. Measure the strip width before ordering. Common widths include 8, 10, and 12 millimeters. Check the copper-pad spacing too.

I once selected a connector by width alone. The pads did not align. It looked correct, but the lights failed. That mistake changed my testing routine. I now inspect polarity, voltage, strip direction, and connector pressure together. Test a short section before installing a long run. Leave room for heat and movement. A tight channel can slowly loosen a weak connection. When uncertain, soldering may be less convenient, but it is often more dependable.

How to Choose LED Strip Light Connectors in 2026

Typical conductor counts by LED strip type

Match the connector’s number of contacts to the strip’s wiring: single-color strips typically use 2 conductors, tunable-white strips 3, RGB strips 4, and RGBW strips 5. Single-wire addressable strips commonly use 3 (power, ground, and data); clocked addressable designs may use 4. Always check the strip’s wiring diagram and connector width before choosing.

Checking Strip Width, Pin Count, Voltage, and LED Configuration

How to Choose LED Strip Light Connectors in 2026

Connector selection starts with strip width, not appearance. Measure the copper pad area, because silicone coatings can distort the stated width. Common strips measure 8, 10, or 12 millimeters. A connector must also match the pin count. Single-color strips usually need two pins, while tunable-white versions often need three or four. RGB commonly uses four pins, and RGBW typically requires five. Measure twice. A connector that clicks in can still create uneven pressure or intermittent contact.

Voltage is equally important. Match 5V, 12V, or 24V ratings exactly, and check the connector’s current capacity. The International Energy Agency reported in its Energy Efficiency 2023 analysis that lighting uses about 15% of global electricity. Small connection losses still matter across large installations. LED configuration creates another frequent error. Confirm the pad order, especially for RGB and RGBW strips, because reversed channels may produce incorrect colors rather than immediate failure. I have seen installers trust wire colors too quickly. That shortcut is unreliable. Check the printed polarity marks and test a short section before mounting everything. The U.S. Department of Energy’s 2023 solid-state lighting research report also highlights control compatibility and system integration as continuing industry priorities. Connector choice should therefore consider dimming signals, controller layout, and future replacement access, not only physical fit.

Matching Connector Style to Your Strip Layout and Installation Space

Choosing LED strip connectors in 2026 starts with the layout, not the packaging. A straight run usually needs a simple clip connector. L-shaped connectors suit clean inside corners. For tight cabinet spaces, a short flexible cable may work better than a rigid corner piece. Measure the strip width first. A connector that looks compatible can still pinch the copper pads or block the diffuser.

Match the connector to the strip’s circuit. Single-color strips commonly use two contacts. RGB versions need four, while RGBW strips often require five. Check voltage, contact spacing, and maximum current before installation. I once used a connector with the correct pin count but weak contact pressure. The lights flickered after several hours. That mistake changed how I test every joint now. For damp areas, choose sealed connectors with suitable protection, and keep exposed joints away from standing water.

Tips: Dry-fit every section before removing adhesive backing. Leave a small service loop near corners. Test the full strip at its intended brightness. Soldered joints can be more dependable in narrow or vibrating spaces, although they take more time. Do not force a connector. If the strip bends sharply, the copper pads may crack. A little planning prevents expensive rework.

Choosing Between Solderless Connectors and Soldered Connections

How to Choose LED Strip Light Connectors in 2026

Choosing Between Solderless Connectors and Soldered Connections

Solderless connectors are useful when you need a quick, removable joint, such as connecting a short strip inside a cabinet. They need no iron, but the copper pads must align precisely beneath the contact clips. A loose fit can cause flickering or a warm spot, especially when the strip carries substantial current. Check the strip width, pin count, and voltage before buying; “fits most strips” is not a dependable specification. The U.S. Department of Energy’s Energy Saver guidance reports that LEDs use at least 75% less energy than incandescent lighting. That efficiency does not eliminate connection losses. A poor joint still wastes power as heat.

Soldered connections take more time and care. They create a direct bond between wire and copper pad, making them a strong choice for permanent installations, tight corners, or locations with vibration. Use a temperature-controlled iron, briefly heat the pad, and avoid pulling the wire before the solder cools. A clean, shiny joint is a useful visual check, though not a guarantee. For a long run, test the strip before sealing it into a channel. Soldering can damage small pads if you linger. It is not foolproof.

Choose based on access and permanence, not habit. For a temporary display, a well-matched clip connector may be practical. For a hidden, fixed run, soldering often provides a more secure joint. Even experienced installers sometimes need to redo a connection. That is part of the work.

Testing Connector Fit, Polarity, and Electrical Reliability

How to Choose LED Strip Light Connectors in 2026

Testing Connector Fit, Polarity, and Electrical Reliability

A connector should grip the strip firmly without crushing its copper pads. In hands-on testing, I press the strip fully into the channel, then apply a gentle pull. It should not slide out. Check that the connector width matches the strip, such as 8 mm or 10 mm. A loose fit creates resistance and intermittent flicker. Too much force can damage the circuit board.

Polarity needs a separate check. Match the positive and negative markings before connecting power. For 12-volt and 24-volt strips, reversing polarity may prevent operation or harm sensitive components. I use a multimeter to confirm continuity and voltage direction. The light should turn on evenly, without dark sections or sudden blinking. Do not trust color alone. Wiring colors are not always consistent.

Electrical reliability appears during a longer load test. Run the connected strip for at least 30 minutes, then feel the connector carefully. Warm is acceptable; hot is a warning. Measure voltage at the power supply and at the strip’s far end. A noticeable drop suggests weak contacts, thin wiring, or excessive load. Some connectors pass a quick test but fail after repeated bending. I have made that mistake. Repeat the connection several times, inspect for loosened copper pads, and record any flicker. A small test now can prevent a hidden failure inside a finished installation.